

Okay, my current project is fun and of course involves recycling...I took a Morton Salt container:

Removed the label, and measured out a window to be cut out:
Then I cut out the window and the bottom:
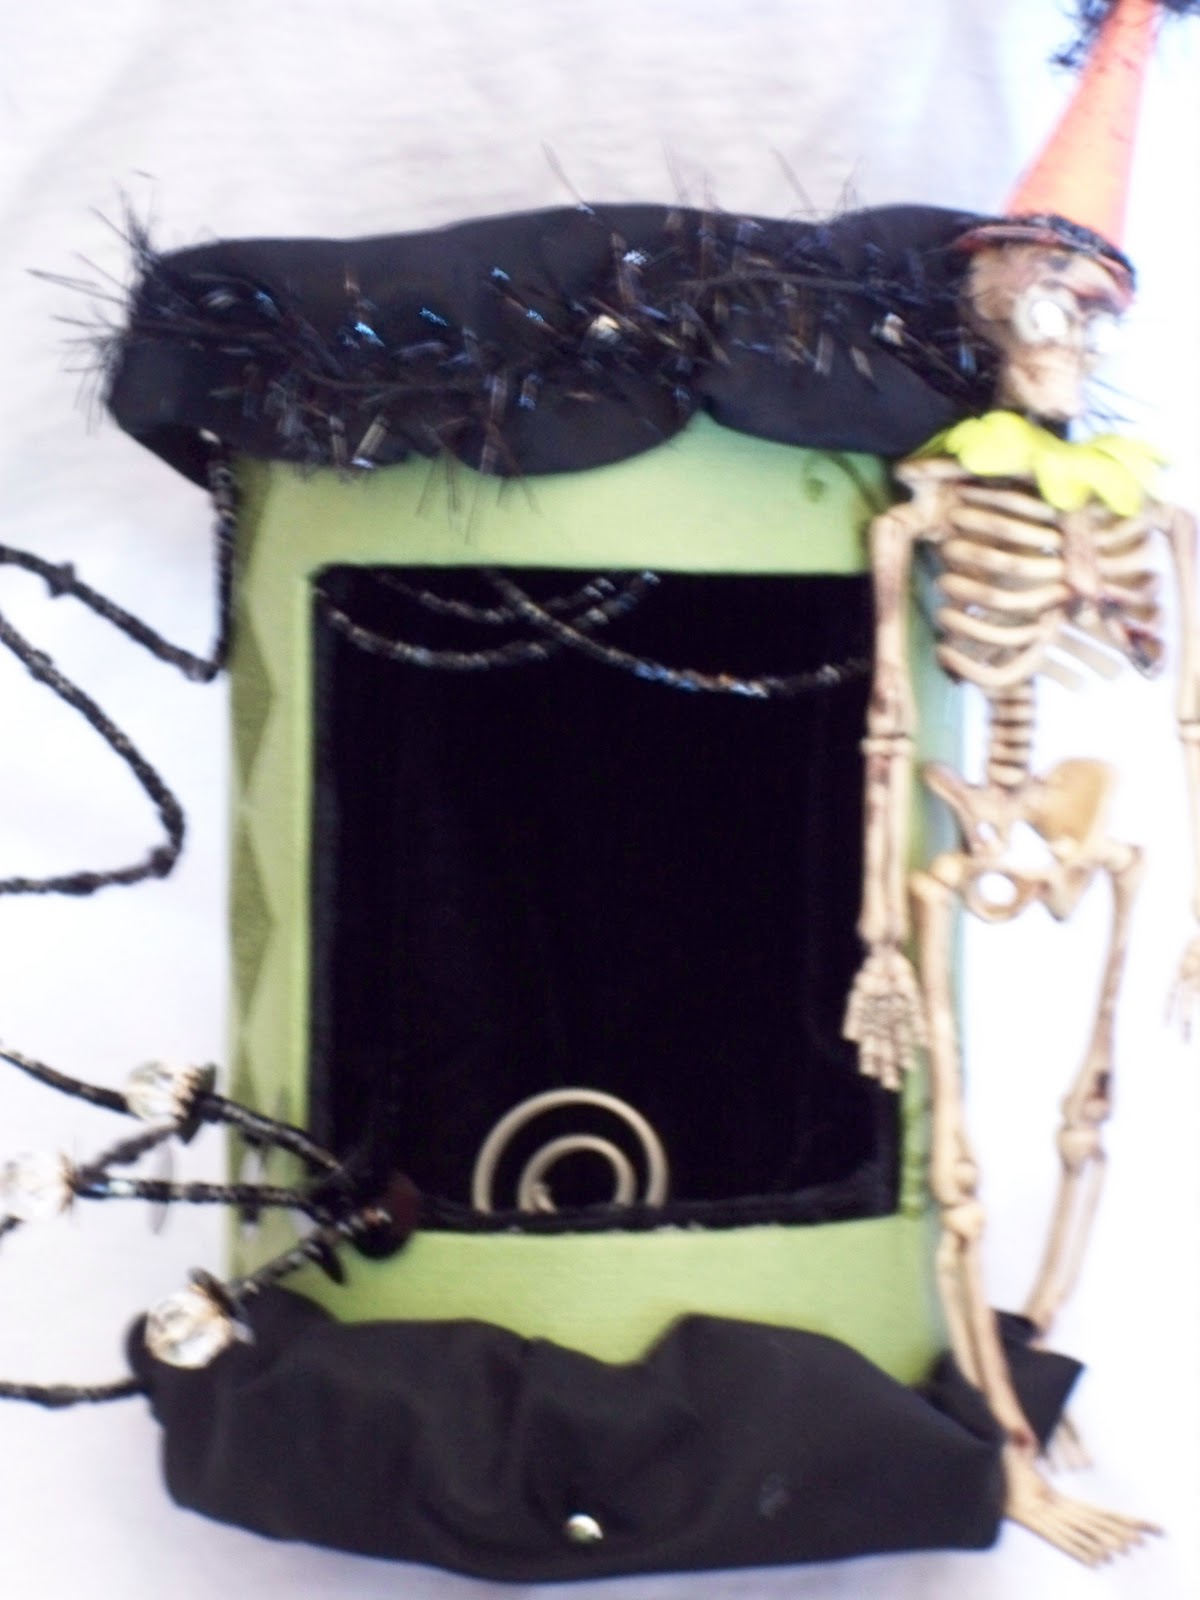
The container is very sturdy and you can either paint it, I would use Gesso first to seal it, or you can cover it with paper. I chose paper. The inside was lined with velvet. I put beads on a wire on the outside. Some beads were put on fishing string and hung from the inside. There is a swirl inside in the center to hold a photo. I put some fun ribbon around the top and finally my dressed up skeleton.
Here is my creation so far, I think I may add a banner with the year.
Now if you remember I like when my projects have a function. So this one will actually hold a photo:

I had fun altering this container and plan on doing a few more.
Be creative,
Ramona

Altered Pencil Boxes:
My current project is altering pencil boxes. What I like about this project is they are useful pieces for your desk or as a gift box.
I like to use StazOn inks to color my boxes. You could also use paints, but I like the quick drying of the inks. StazOn's is suitable for all surfaces and is permanent. If you spritz water right after you apply it you will get water marks that add a weathered look.
Then I start ripping paper, distressing the edges, and gluing it down. Then I cut out pictures of fishes and glued them down. I stamped some flourishes, then used Stickles glitter glue to add sparkle. I also stamped bubbles.
Have you ever used Stickles glitter glue? I love this glitter glue! Why you ask, because when it dries it dries flat. The tip is small and you can outline as well as fill in, if you apply more than one coat you can get a raised look. Love it!
I apply Glaze over the top of the project. The Glaze acts as a glue but adds a shimmer. Depending on how much you apply you can add just a little color or apply more for a deaper color. When you alter items the Glaze adds dimension and helps bring color to pages or projects. On paper projects the Glaze doesnt breakdown your paper. Glaze comes ins many colors here are the colors I currently have.
Here are two of my works in progress, I still have to addsome words and embellishments. The first one is done using some fish paper I found and I had to have it...koi fish are so beautiful. Once done I will show you the finished product. The second one is of a girl and butterfly...I really like how this one is coming along.
Go create something wonderful today!
CD'S, TIN CANS AND BOTTLE CAPS:
What do you get when you have used CD's, bottle caps and beads lying around? A craft project that anyone would love to hang on their wall.

1Start by gluing the can lid to the CD with the E6000 glue. I glue four to five at a time and let them dry for a couple of hours.
Then you glue the bottle caps around the edge of the CD and can lid. You will find the bottle caps tip over the edge of the CD but don't fret, once you have them all glued down you are going to flip the whole project over to let it dry. This will straighted out the bottle caps.
Once this has dried for a couple of hours you can start gluing on beads. This is where the fun begins. The piece starts to take shape and you can add as many or as little beads as you would like.
Keep in mind since this is metal, alcohol inks work great on this project! Now you use your 1" hole punch and add your personal photos or ephemera. In the center you can even put a mirror if you want. On the back glue a picture hanging hook or ribbon for hanging your project on the wall.
Here is a photo of one I used the inks on and added some photos. Also, this one used a small tin can from cat food not a can lid.
Inside the tin can I glued a plastic bottle cap to raise the photo up. Around the plastic bottle cap I glued tin foil that I had used alcohol inks on. You can see how I glued beads on this project.
This project was introduced to me on a cruise we took with Kathy Cano-Murillo, "The Crafty Chica", and I have added my own take.
Be creative,Ramona
ALTERED BOTTLE CAP:

Tutorial:
Bottle cap art has been around for many years, here is our take for those small objects. New and used bottle caps can be transformed into miniature refrigerator magnet art. Many restaurants and bars will give you their used bottle caps for free; all you have to do is ask.
The first thing you have to do is remove the rubber lining. Place all the caps in a small saucepot and bring to a boil. The heat helps loosen the rubber ring. It will take some effort to pull the plastic rings out, I use needle noise pliers. Keep in mind some rings may not come out even after some effort.
Dry the caps don’t leave them in the water or even wet as they will start to rust. At this point you may also want to use your pliers to bend the rim of the bottle cap out slightly.
A 1" hole punch makes this project easier. If you dont have a 1" hole punch you can use a quarter. Each are the perfect fit for the inside of the bottle caps.
Photos of family, friends and ephemera can be cut to fit inside the bottle cap. Once you decide which photos and objects to use you can start gluing them into the bottle caps. I use a paper glue.
Embellish the bottle cap as you desire. On the ones pictured I have glued beads to the outside rim and some fake diamonds on the inside rim. Tap a hole in the bottom and insert a jump ring for beads to dangle.
Cover the entire inside with a glaze or dimensional adhesive, removing all excess glaze. Let this dry overnight.
Finally use a strong glue like E6000 to glue a magnet to the back, let dry overnight.
Be creative,
Ramona and Samantha